Smoother animations with a lightweight system.
By Max Fagerström
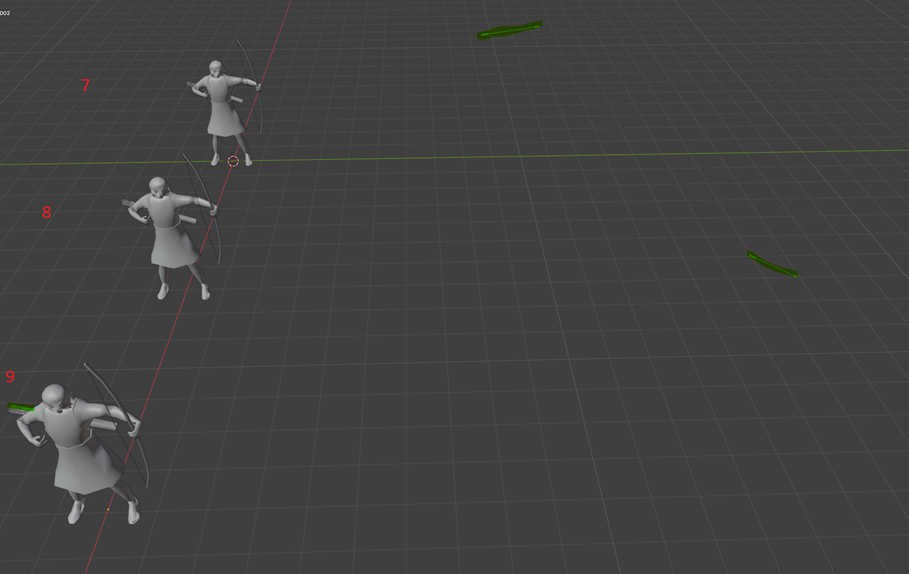
In this blog post, Max Fagerström walks through how we implemented blend shape animation support in the Evergreen Game Engine and how it’s now used in Iterum. Before this system, the game relied on a small set of rough frame by frame animations, which were difficult to scale and produced uneven results. With blend shapes, our animations are noticeably smoother, the export workflow for artists is far lighter, and the system has opened the door for us to animate around 100 units in the game without the overhead that our previous method required.
Background
Initially, units in the game had no animations; they were static meshes moving around the Iterum board. Animations were direly needed for the units in the game. There were some animations in the game already—such as birds and flags on settlements—using frame by frame animations. These animations:
- Produced choppy motion unless many frames were used
- Had a large impact on total file size due to the number of models required
- Created a heavy export workflow for artists
- Were impossible to scale to the ~100 units planned for Iterum
Because the frame‑by‑frame approach required many individual models to achieve acceptable smoothness, both the export workload and the size of the asset folder grew rapidly. The system used for the birds and flags was also very limited: it supported only a single animation loop, where each frame was a separate .obj file and the entire model was swapped out every frame.
While this method worked for a few simple environmental animations, it would be far too cumbersome to use for Iterum’s units. Creating smooth animation cycles for dozens of unit types would require an unmanageable volume of models and asset management effort.
As we explored alternatives, we examined blend shapes and came across this article explaining the technique: https://antongerdelan.net/opengl/blend_shapes.html . Blend shapes looked promising because they integrated naturally into our existing workflow and provided smoother animations without requiring us to implement a full skeletal animation system.
Adapting Blend Shapes
The reference article I used focused on facial animation and demonstrated a model containing three separate vertex‑position buffers—one for each expression it could blend between. While this setup wasn’t directly applicable to our needs, it highlighted an approach we could adapt. Instead of storing multiple expressions for a single model, we realized we could use the same idea with two different models: the current animation frame and the next one.
By dynamically switching which pair of position buffers the shader received, we could smoothly blend between the attributes of the current frame and the upcoming frame. This gave us a flexible interpolation system without requiring major changes to our asset pipeline.
Importantly, this approach meant that our existing animation assets could still be used with minimal adjustments. The only requirement was that each frame’s model must have the same vertex order and vertex count, ensuring the shader could interpolate cleanly between them. Fortunately, newer versions of Blender handle this automatically when exporting multiple poses of the same base mesh, making the workflow straightforward for our artists.
Engine and Shader changes
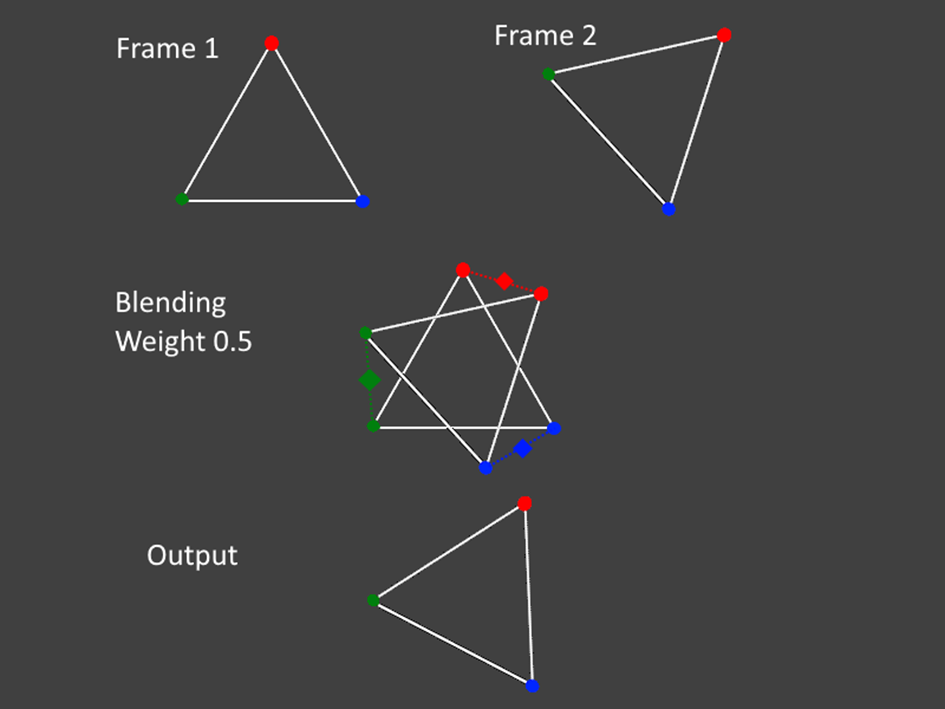
Adapting blend shapes required a few changes to both the engine and the shader pipeline. The main addition in the engine was support for a secondary model pointer on each entity, along with a blend weight value indicating how far the animation has progressed between two frames.
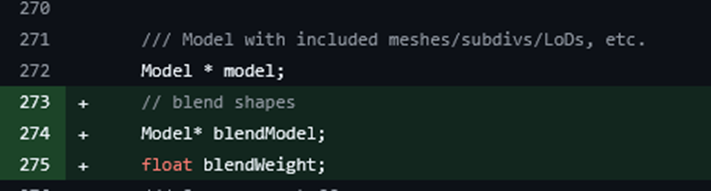
If the secondary model pointer is set, the engine switches to a new render function that accepts both the primary and secondary models. If it’s not set, rendering proceeds as usual using the standard function.
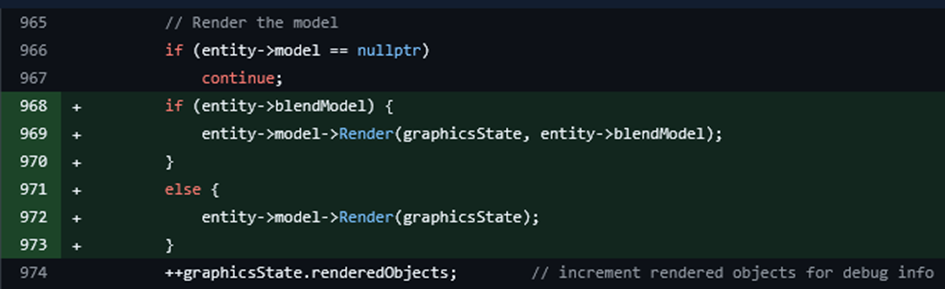
The new render function binds attribute buffers from both models — the current frame and the next frame — so the shader can access them at the same time.
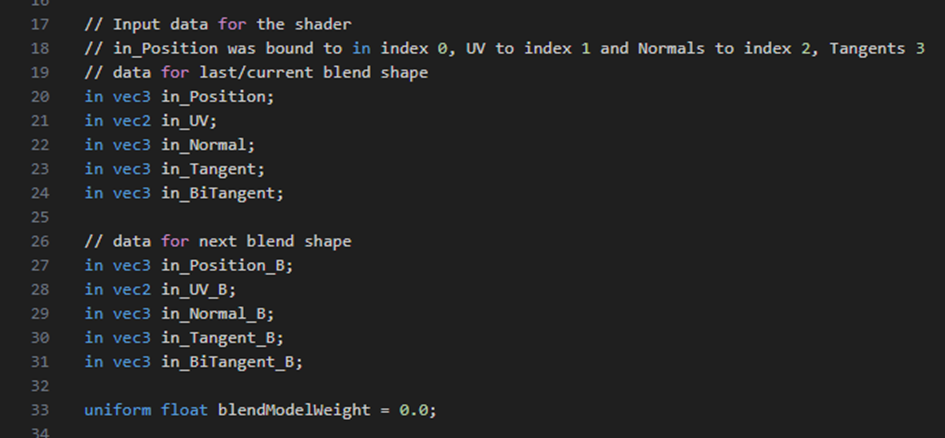
Inside the vertex shader, both attribute sets appear as parallel input streams. With these available, the shader performs a simple linear interpolation between the two models’ vertex attributes using the blend weight.
With these changes in place, the rendered model appears smoothly blended between the current frame and the next, depending on the value of blendWeight. This allows for fluid transitions without needing large numbers of discrete frame models.
Evergreen Engine Graphics coding trivia
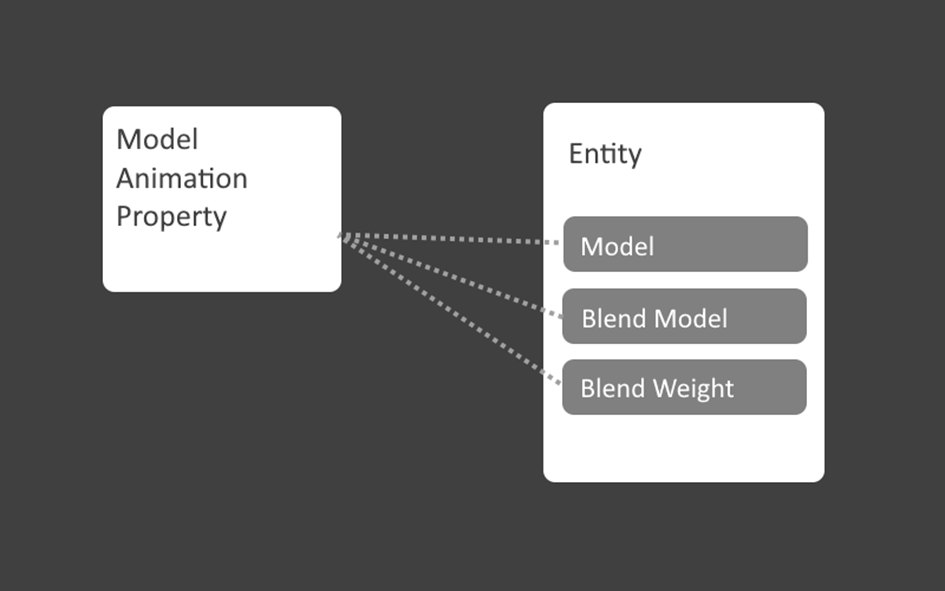
To support blend‑shape animations cleanly, it helps to understand how entities work in the Evergreen Engine. Each entity stores its model, transform, and parent–child relationships, forming the basic structure of the game world.
Entities can also be extended with properties—small, modular classes that add behavior. A property has its own update function and direct access to the entity it’s attached to. This system works similarly to component‑based architectures in other engines and is how our existing ModelAnimationManager operates.
The new blend shape animation manager is implemented as another property. By handling animation logic at the property level—rather than hard coding it into entities—we keep the system flexible, reusable, and easy to maintain. This also ensures that blend shape animations integrate cleanly with the rest of the engine without requiring deep structural changes.
Managing frames and animations
The engine and shader updates provide a simple interface: each entity can be assigned a secondary model and a blend weight, defining how far it has progressed between two animation frames. To make use of this interface, I created a new property class responsible for managing an entity’s animation state.
The initial version of this property was based on the existing ModelAnimationProperty, which handled our previous frame‑by‑frame system. That class simply loaded a list of animation frames and swapped out the entity’s main model for each one. To achieve smoother results with the new blending system, the updated logic assigns both a current model and a next model for each animation frame. During rendering, the blend weight gradually interpolates between them based on the duration of the current frame.
When a frame’s duration completes, the system advances:
- The next model becomes the new current model
- The following model is loaded as the next target frame
- The blend weight resets to zero
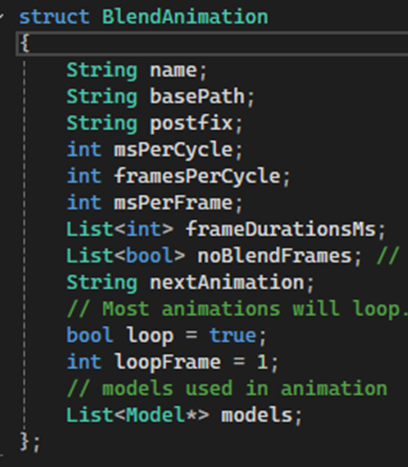
To support multiple animations per entity (idle, walk, attack, etc.), I introduced a separate BlendAnimation structure that stores frame paths and animation parameters. If an animation switches mid‑blend, the system finishes the current blend first, then begins the new animation from its first frame to maintain visual continuity.
I also replaced the earlier hardcoded unit list with an automatic discovery pass: the engine scans each unit’s asset folder for correctly named animation frames, so new animations are picked up without code changes as long as the naming and folder structure are consistent.
This setup keeps the pipeline scalable and low maintenance as more units gain animations.
Config files
As the artists created new animations with this system it became clear that we needed some control over how some animations are played, like the time it takes to cycle though every frame and where the loop point should be. This is data we want to have specific to each animation. Hard coding it in engine would not be ideal, so to solve this, I implemented config files for animations. In these files you can specify parameters for an animation, and the config file lives in the same path as the animations themselves do.
Frame Duration
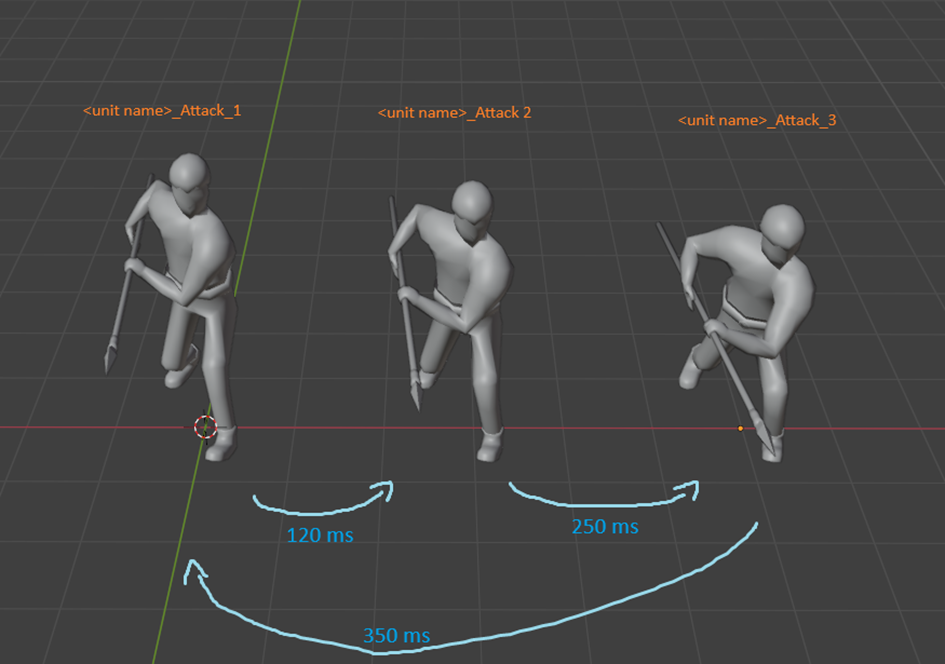
The first feature added to the config system was the ability to override frame durations. Not all frames should transition at the same speed; for instance, a spearman should thrust quickly but retract more slowly. The config file allows specifying per‑frame timing like this:
Duration Attack 1 120
Duration Attack 2 250
Duration Attack 3 350
These values control how long the animation blends between each frame.
This gives artists precise control over timing nuances, without requiring any changes in engine code.
Non-blending frames
Some animations require certain frames to switch instantly without interpolation. A good example is projectiles: if we blended an archer’s frames, the arrow or spear would visibly “slide back” into the initial position when the animation loops. To avoid this, the config file can mark specific frames as non‑blending, causing the model to swap immediately.
This lets us combine smooth blend shape interpolation with precise hard cuts where needed, ensuring animations behave correctly in all scenarios.
Limitations and special considerations
While the blend shape system is lightweight and easy to integrate, it comes with a few limitations compared to more advanced techniques like skeletal animation. Since the system simply interpolates vertex positions in straight lines, certain motions may look unnatural unless the animation is authored carefully.
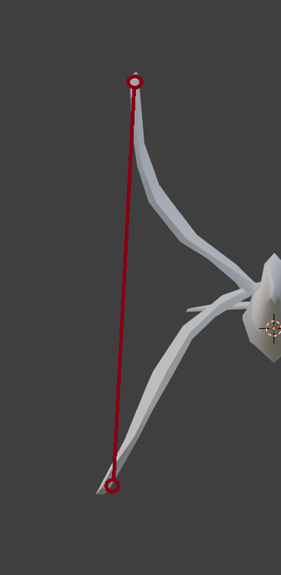
For example, if a bird’s wing is animated using only two poses—fully up and fully down—the interpolation will move the vertices directly between those positions. This creates a straight, mechanical looking motion rather than the natural curved arc that a wing would follow.
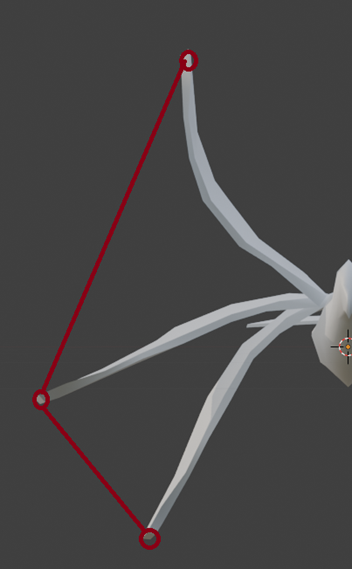
To address this, artists may need to add intermediate poses to guide the motion along a more realistic path. In the wing example, an additional “neutral” frame positioned midway between the up and down poses ensures the blended animation forms a smooth arc rather than a linear drop.
This approach keeps the system simple while still allowing for natural looking animations, as long as artists author their frames with these considerations in mind.
Conclusion
Implementing blend‑shape animations turned out to be a practical middle ground between our old frame‑by‑frame system and a full skeletal animation pipeline. The approach gave us smoother, more expressive motion without requiring major changes to our asset workflow or engine structure. Along the way, I learned a lot about how tightly the engine, shaders, and asset pipeline need to work together for even a “simple” feature like vertex blending to behave consistently.
There are still areas we can improve—better tools for previewing animations in the editor, more automation around validating vertex order, and exploring hybrid setups for units that might benefit from limited bone‑based motion. But overall, this system has already made it possible for us to animate far more units than before, without the exponential workload that our previous method required.
If you have questions about any part of the process, ideas for improvements, or want to know more about how the Evergreen Engine handles graphics under the hood, feel free to reach out.
